How to Use Branded Domains for Your Short Links
This feature is available on the Starter plan and above.
One of the best ways to build trust with your customers is to use links that feature
your own brand name. Instead of a generic short URL, you can create links
like links.yourstore.com/special-offer.
This looks professional and lets shoppers know they're clicking on a link that truly comes from you. This guide will walk you through connecting your subdomain to FlashWombat.
This process can seem a bit technical, but it's just a few "copy and paste" steps.
If you get stuck, please reach out to us at support@flashwombat.com or via our
support form. We're happy to help!
Before You Begin: Use a Subdomain
First, a quick and important tip! We highly recommend using a subdomain rather
than your main store domain (e.g., yourstore.com).
A subdomain is an extension you add to the beginning, like links.yourstore.com or
go.yourstore.com. Using a subdomain is the safest and easiest method because it
won't interfere with your main Shopify store's website.
1: Add Your Subdomain in FlashWombat
The first step is to tell FlashWombat which subdomain you want to use.
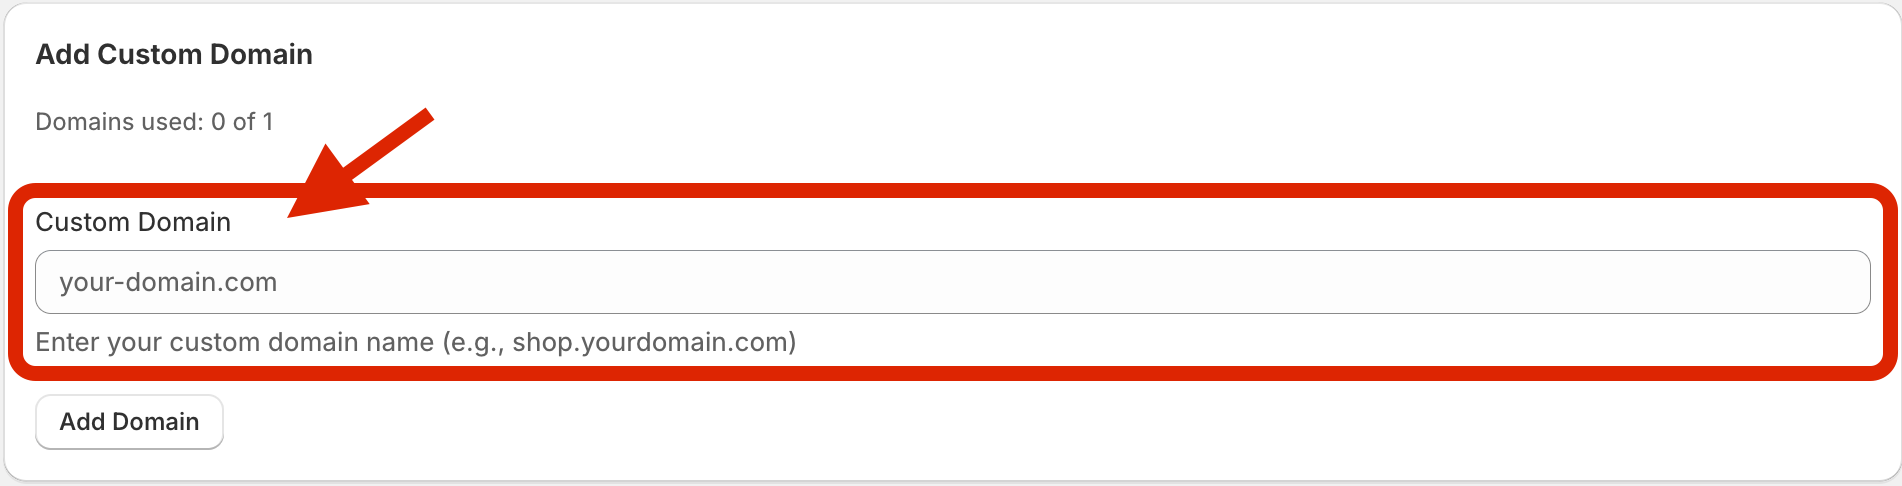
- Navigate to the Custom Domains section in the sidebar of your FlashWombat app.
- In the Add Custom Domain section, enter the subdomain you want to use (e.g.,
links.yourstore.com). - Click Add Domain.
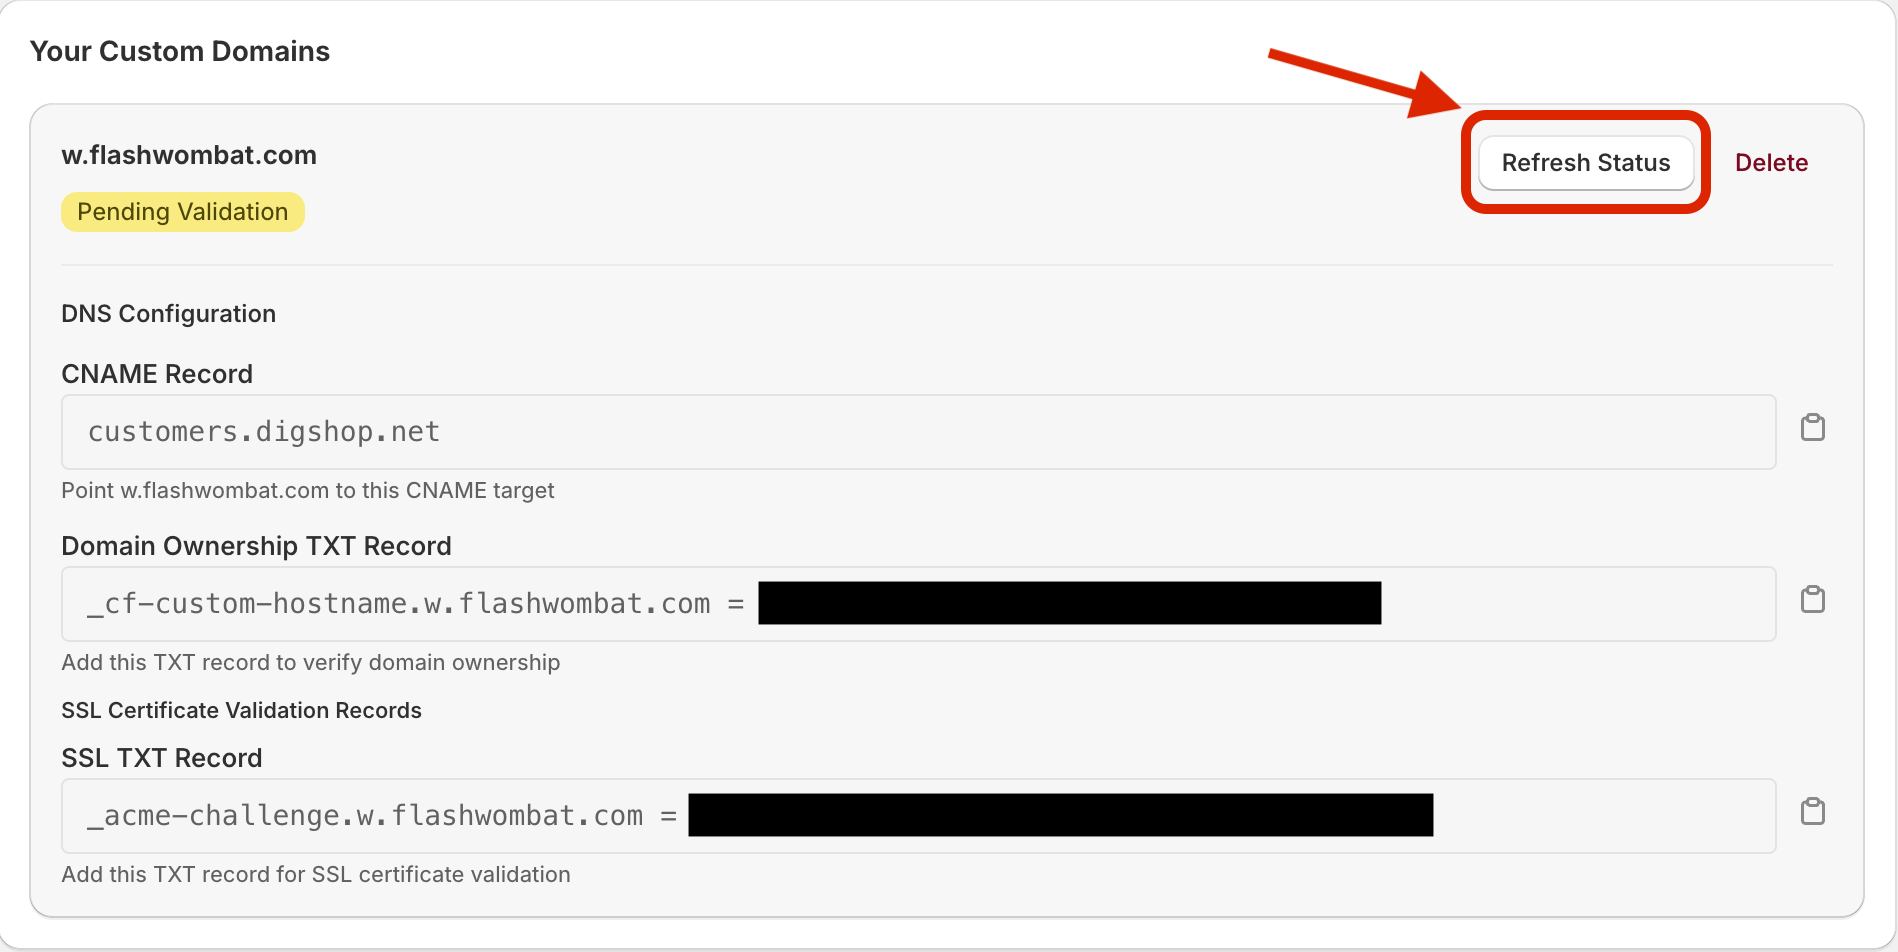
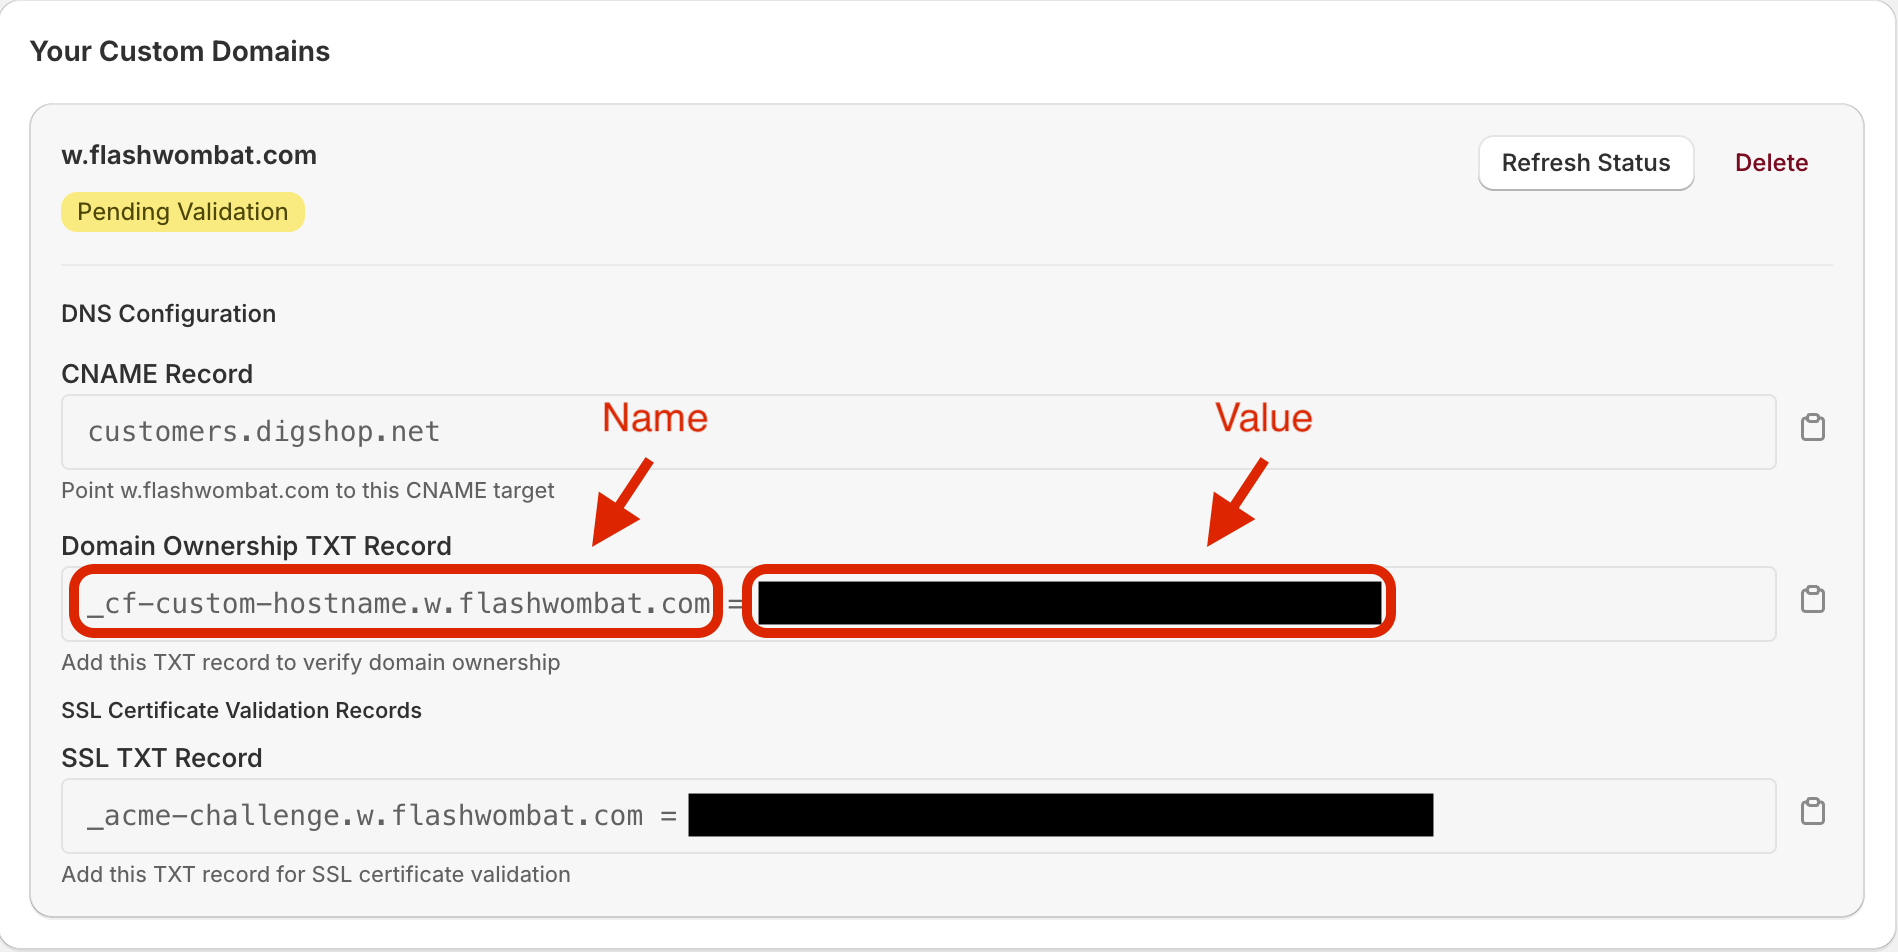
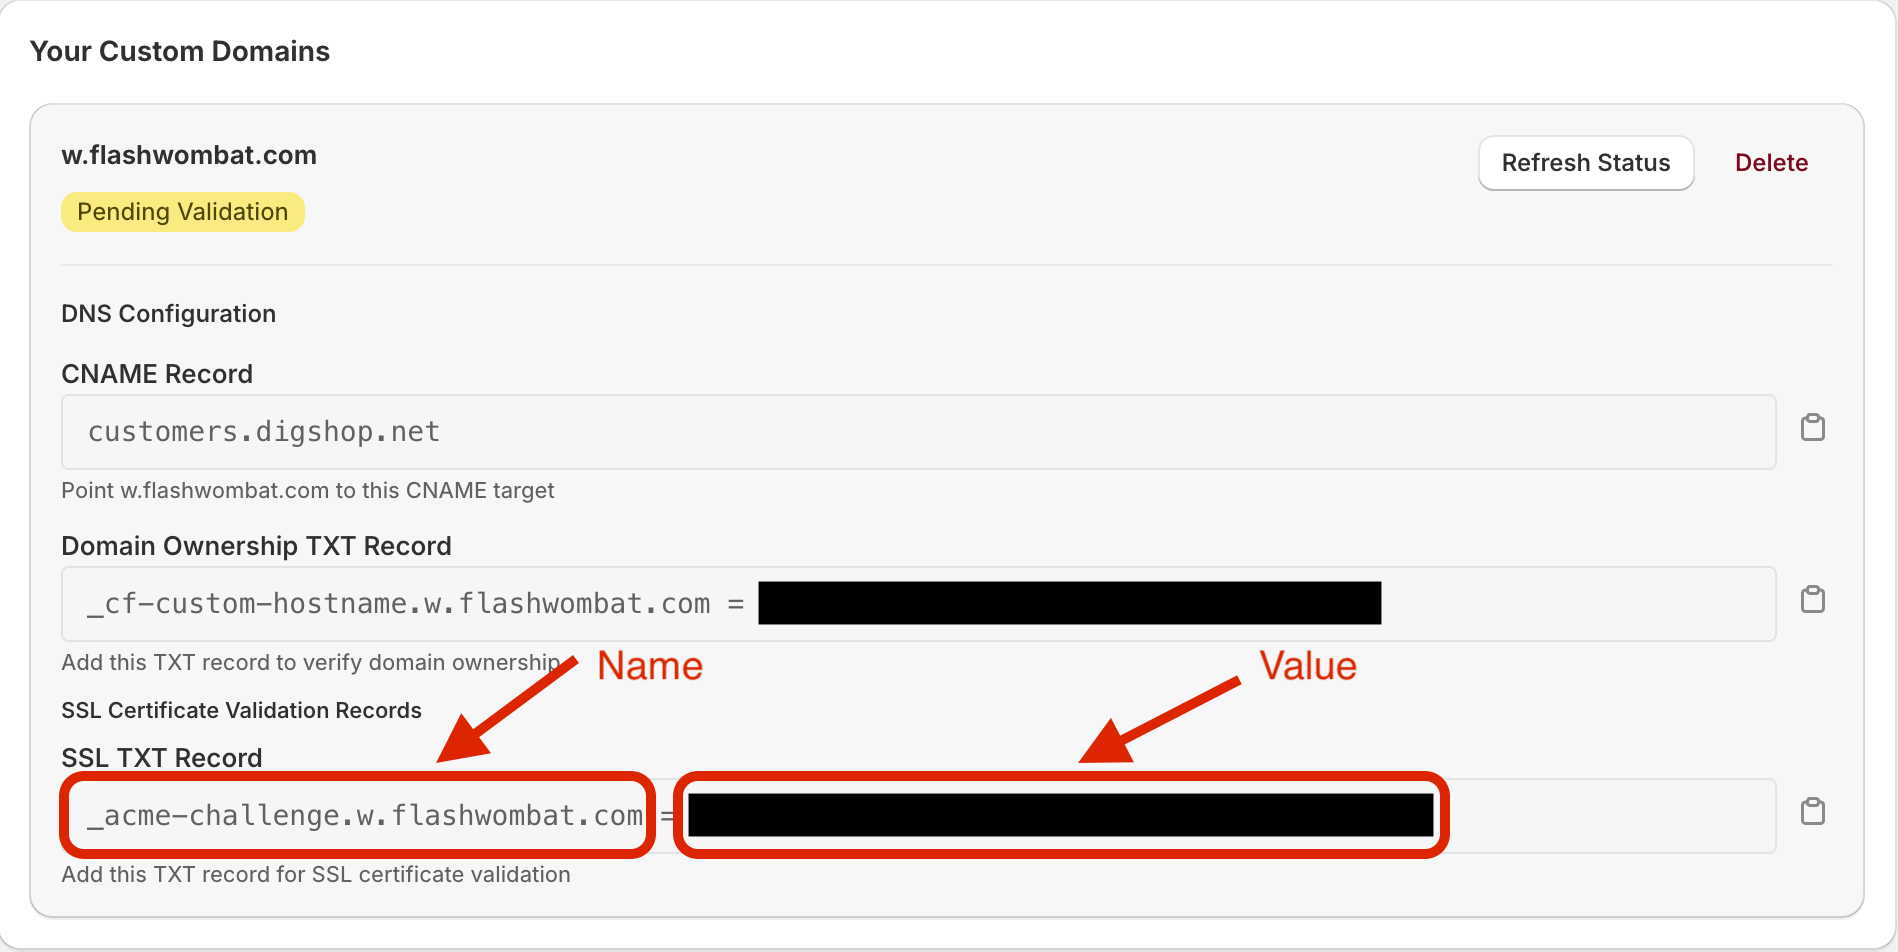
After adding it, FlashWombat will show you a list of records you need. This will include one CNAME record and two TXT records. Keep this page open! You'll need to copy these values for the next step.
A: Add the CNAME Record (The Main Redirect)
- Look for an option to Add a new record and select CNAME as the type in your domain registrar (e.g Godaddy and Namecheap).
- Copy the values from FlashWombat:
- Type:
CNAME - Host/Name: Enter just the subdomain part (e.g.,
links).- Note: Some providers might require the full subdomain, like
links.yourstore.com. Please check their help docs if you're unsure.
- Note: Some providers might require the full subdomain, like
- Value/Points to: Paste the value from FlashWombat (it will look something like
customers.digshop.net).
- Type:
- Save the record.

B: Add the TXT Record (for Domain Verification)
- Add another new record, this time selecting TXT as the type in your domain registrar (e.g Godaddy and Namecheap).
- This record proves you own the domain. Copy the verification values from FlashWombat:
- Type:
TXT - Host/Name: Paste the
_cf-custom-hostnamevalue (e.g.,_cf-custom-hostname.links) or_cf-custom-hostname.links.yourstore.com. - Value/Points to: Paste the long verification code provided by FlashWombat.
- Type:
- Save the record.
C. Add the Second TXT Record (for HTTPS/SSL)
- Add one more new record, again selecting TXT in your domain registrar (e.g Godaddy and Namecheap).
- This record ensures your new links are secure (using
https):- Type:
TXT - Host/Name: Paste the
_acme-challengevalue (e.g.,_acme-challenge.links) or_acme-challenge.links.yourstore.com. - Value/Points to: Paste the unique value provided for this record.
- Type:
- Save this final record.
3: Verify Your Setup in FlashWombat
You've done the hard part! Now, go back to the Custom Domains page in your FlashWombat app.
Click the Refresh Status button. It can sometimes take a few minutes (or in rare cases, up to 48 hours) for your new settings to be visible across the internet. This is called "propagation."
Once it's connected, you'll see an Active status. You can now select this domain from the dropdown menu when creating your short URLs!